

-
[게임엔진활용] 1-3강 해상도2 및 쉐이더[DSU] 게임엔진활용 2026. 3. 12. 22:34728x90
Cube가 세로로 길어진 것을 정상적으로 보이도록 변경해보겠습니다.
MainCamera.cs에 선언된 RenderTexture rt는 1280 x 720으로 생성되었는데, 디스플레이 화면 종횡비 기준으로 세로가 더 깁니다.
영역을 제대로 확인하기 위해서, 소스 코드 2군데를 수정해서 실행한 모습입니다.
GL.Clear(true, true, Color.red);// Color.black
ScaleMode.ScaleToFit);// StretchToFill
12345678910111213141516171819202122232425262728293031using UnityEngine;public class RenderView : MonoBehaviour{public MainCamera mc;// Start is called once before the first execution of Update after the MonoBehaviour is createdvoid Start(){mc = FindFirstObjectByType<MainCamera>();}// Update is called once per framevoid Update(){}void OnGUI(){if (mc != null && mc.rt != null){GL.Clear(true, true, Color.red);GUI.DrawTexture(new Rect(0, 0, Screen.width, Screen.height),mc.rt, ScaleMode.ScaleToFit);}}}cs 
GUI.color = Color.blue 코드를 추가하고 실행한 모습입니다.
원색 RGBA에 (0, 0, 1, 1) 값이 각각 곱해서 들어간것을 알 수 있습니다.
1234567891011121314151617181920212223242526272829303132using UnityEngine;public class RenderView : MonoBehaviour{public MainCamera mc;// Start is called once before the first execution of Update after the MonoBehaviour is createdvoid Start(){mc = FindFirstObjectByType<MainCamera>();}// Update is called once per framevoid Update(){}void OnGUI(){if (mc != null && mc.rt != null){GL.Clear(true, true, Color.red);GUI.color = Color.blue;GUI.DrawTexture(new Rect(0, 0, Screen.width, Screen.height),mc.rt, ScaleMode.ScaleToFit);}}}cs 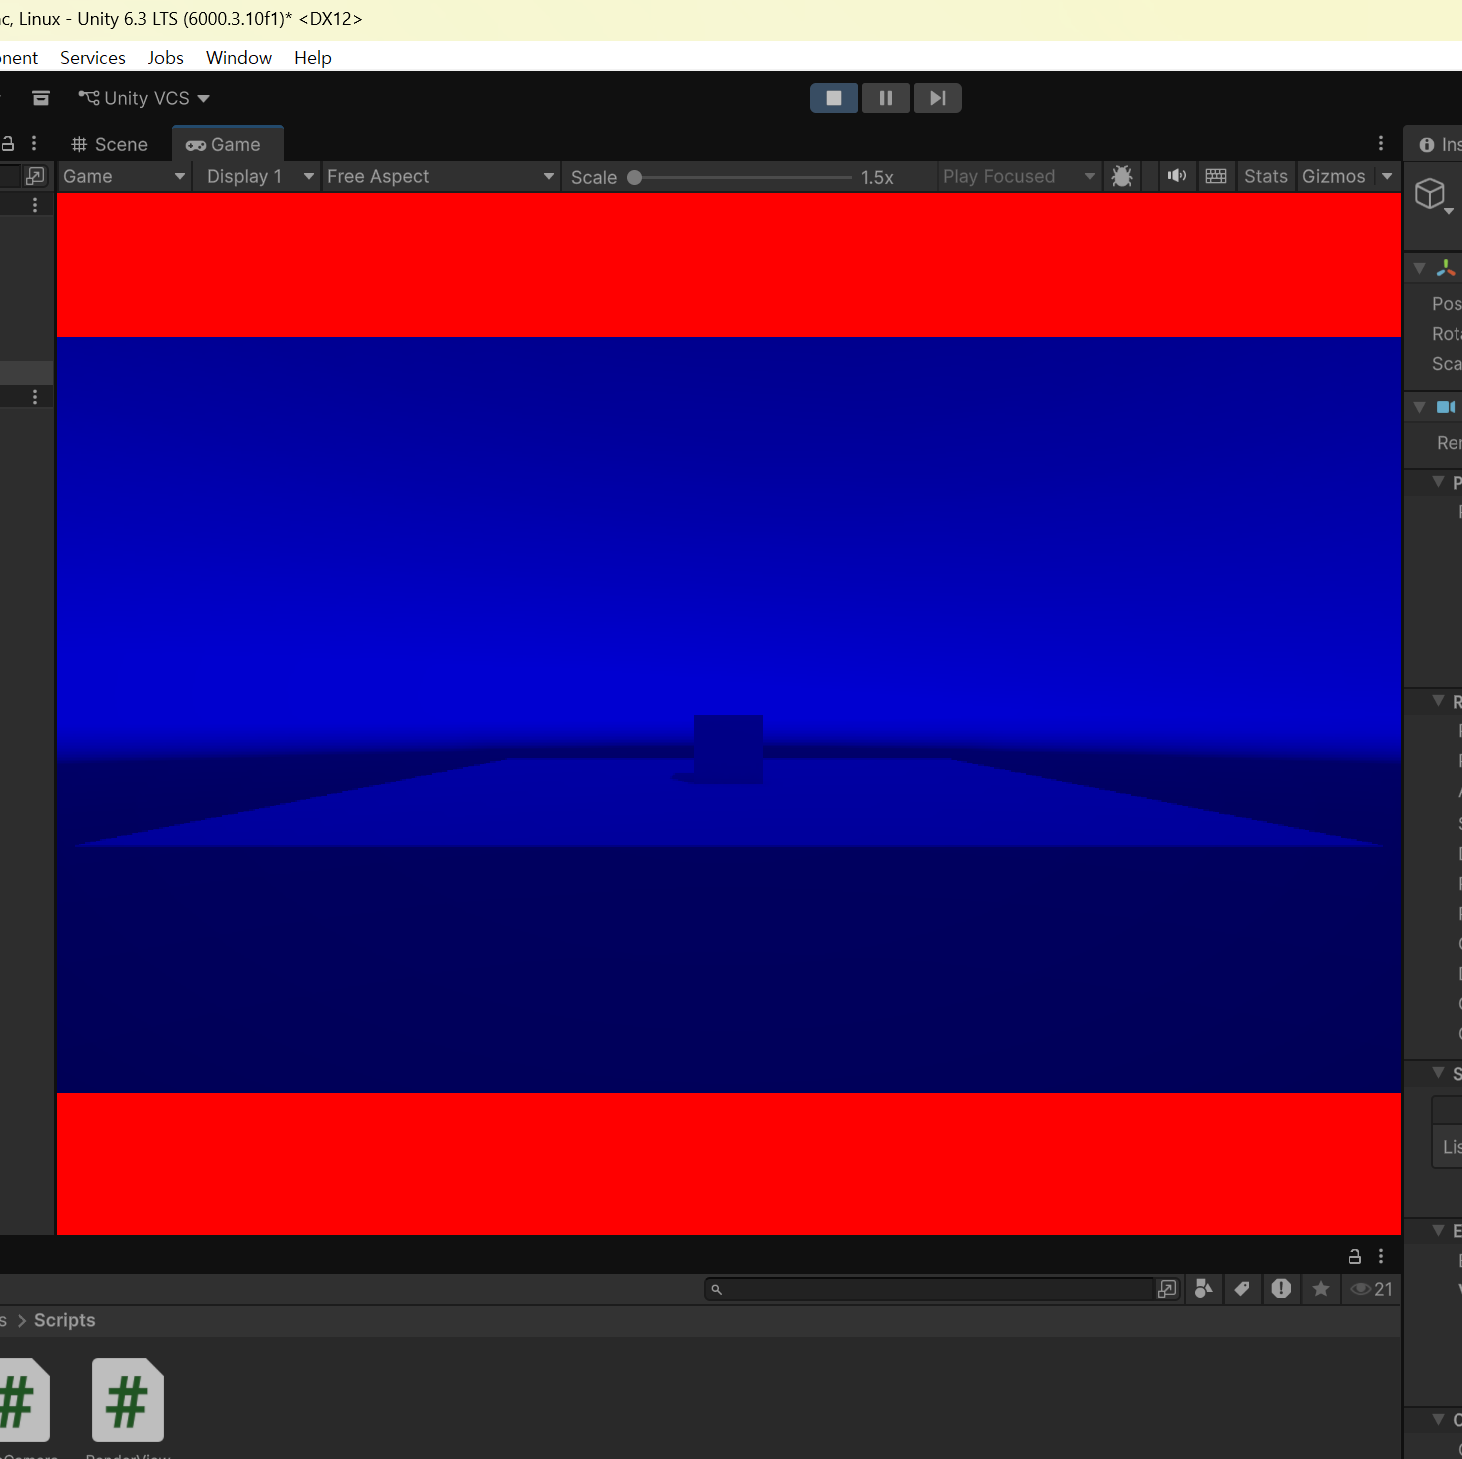
GUI.DrawTexture 함수는 일반적인 그리기에 사용하기에 충분합니다.
다만, 텍스쳐를 회색처리, Blur, 모자이크 등 특수효과를 사용하기에는 기능이 부족합니다.
Graphics.DrawTexture 함수는 Material을 활용해서 그릴수 있기 때문에 시스템에서 제공하는 쉐이더를 이용하거나, 사용자가 임의로 제작한 커스텀 쉐이더를 사용할 수 있기 때문에 게임에서 사용하기 좋습니다.
시스템에서 제공하는 기본 쉐이더를 사용했습니다.
Material material = new Material(Shader.Find("Unlit/Texture"));
Graphics.DrawTexture는 더 많은 기능을 제공하는 만큼, 직접 처리해야 하는 귀찮음이 있습니다.
GUI.DrawTexture 와 달리 어둡게 그려졌습니다. Unity Old 버전에서는 정상적으로 그려졌지만 새버전에서는 이렇게 그려집니다. 어차피 기본제공 쉐이더를 쓰려고 Graphcis.DrawTexture를 쓰는건 아니니 안심하셔도 됩니다.
12345678910111213141516171819202122232425262728293031323334353637383940414243444546using UnityEngine;public class RenderView : MonoBehaviour{public MainCamera mc;Material material;// Start is called once before the first execution of Update after the MonoBehaviour is createdvoid Start(){mc = FindFirstObjectByType<MainCamera>();material = new Material(Shader.Find("Unlit/Texture"));}// Update is called once per framevoid Update(){}void OnGUI(){if (mc != null && mc.rt != null){GL.Clear(true, true, Color.black);#if falseGUI.DrawTexture(new Rect(0, 0, Screen.width, Screen.height),mc.rt, ScaleMode.ScaleToFit);//StretchToFill#elseTexture tex = mc.rt;float r0 = (float)Screen.width / tex.width;float r1 = (float)Screen.height / tex.height;float r = (r0 < r1 ? r0 : r1);int w = (int)(tex.width * r), h = (int)(tex.height * r);int x = (Screen.width - w) / 2, y = (Screen.height - h) / 2;Graphics.DrawTexture(new Rect(x, y, w, h), tex,new Rect(0, 0, 1, 1),0, 0, 0, 0, material);#endif}}}cs 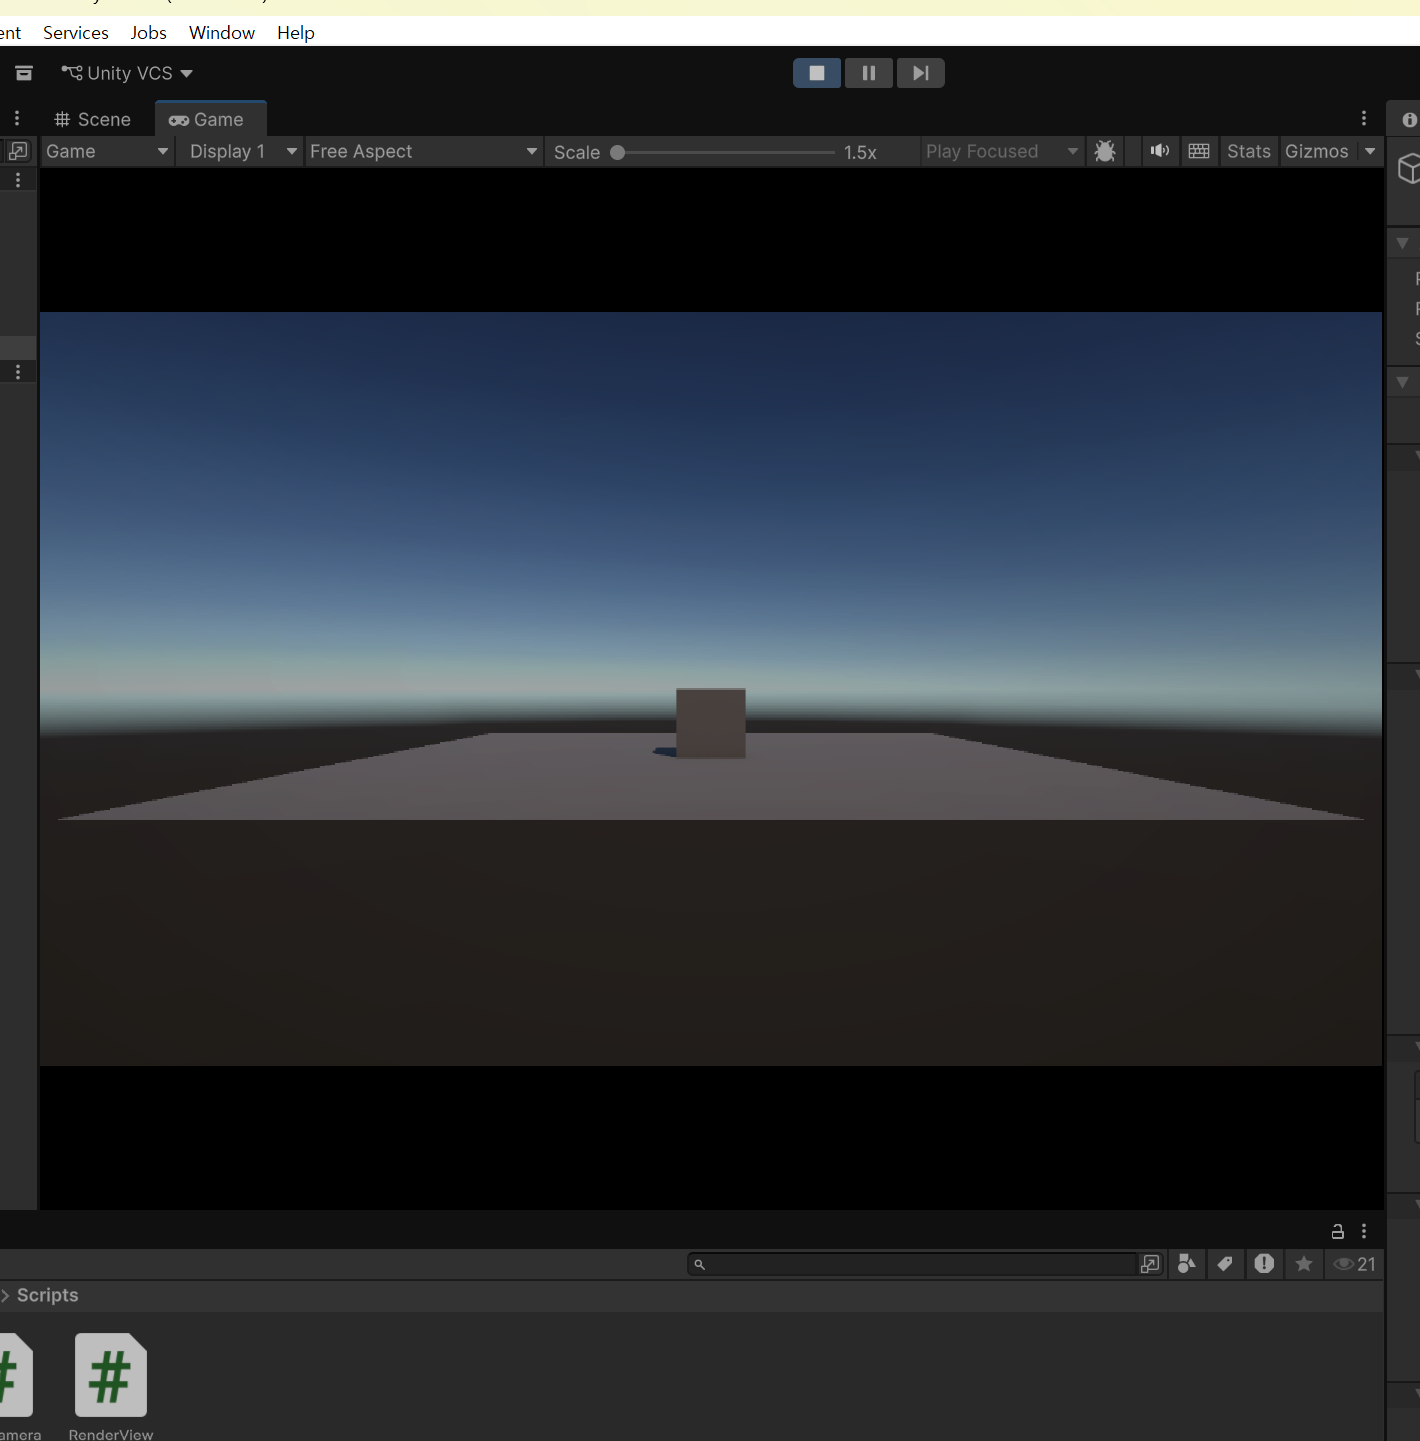
이제 커스텀 쉐이더를 써보겠습니다.
Assets>Scripts에서 우클릭 Create>Shader>URP Unlit Shader로 std.shader파일을 생성합니다.
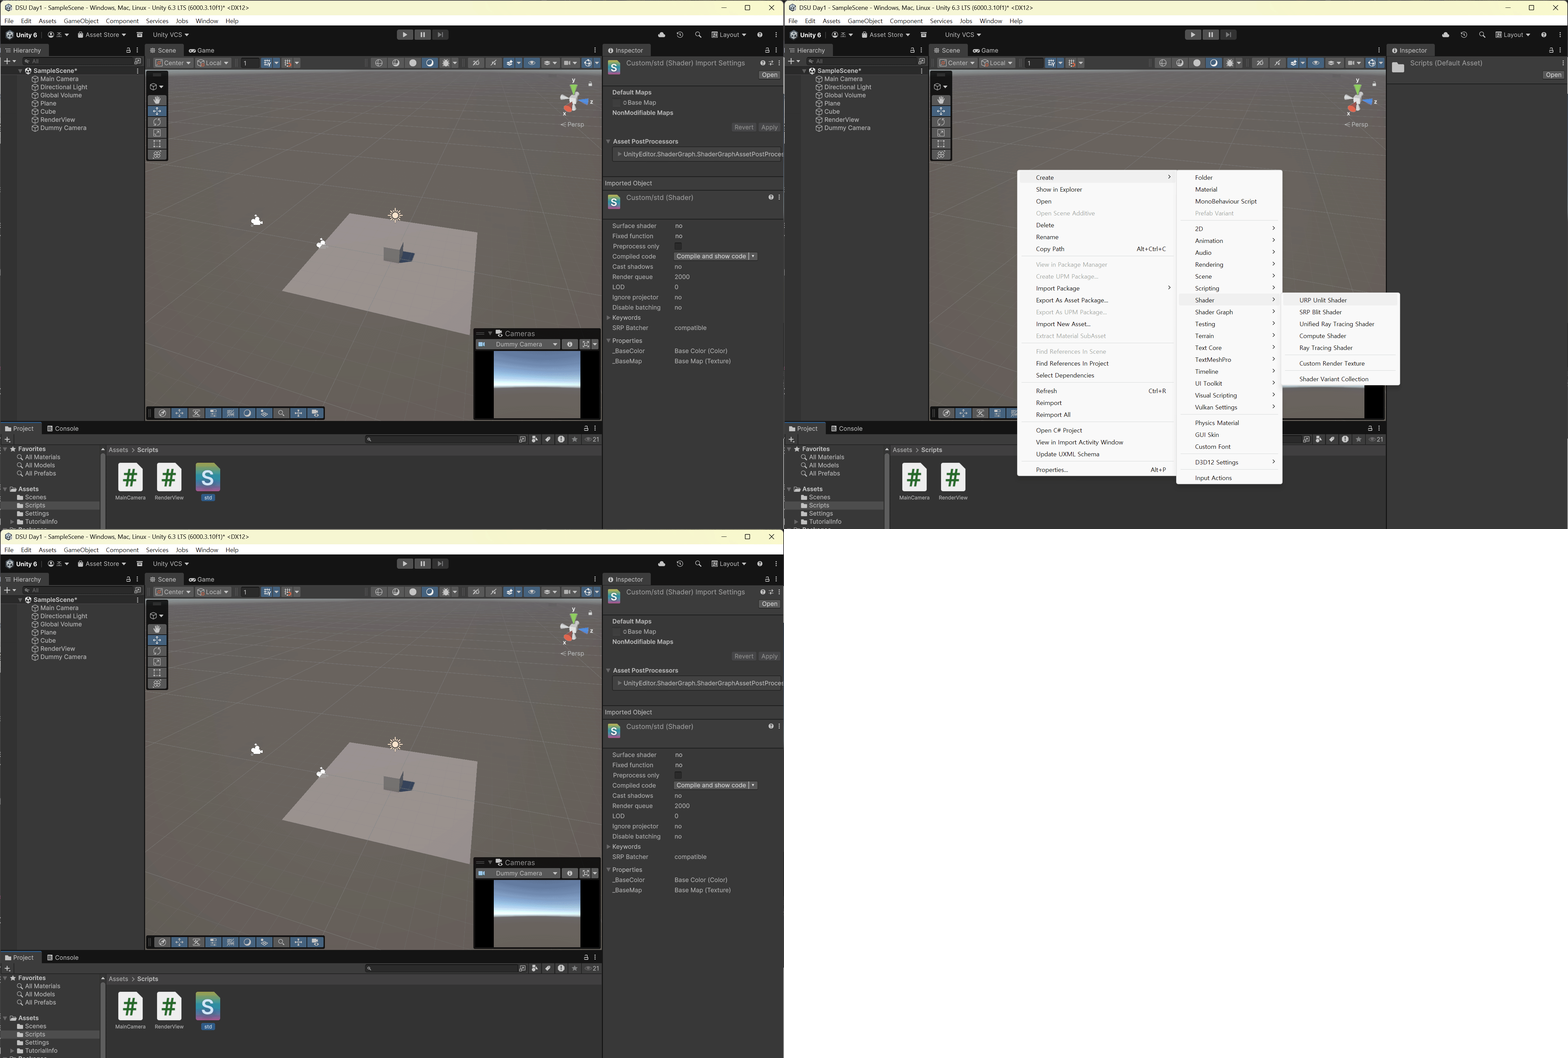
생성된 std.shader를 열어보면, 1 line에 Shader "Custom/std"가 보이는데, Shader.Find 인자값에 입력하면 정상적으로 로드합니다.
34, 35 라인처럼 _BaseMap과 _BaseColor로 쉐이더에 값을 넘겨주면 됩니다.
12345678910111213141516171819202122232425262728293031323334353637383940414243444546474849using UnityEngine;public class RenderView : MonoBehaviour{public MainCamera mc;Material material;// Start is called once before the first execution of Update after the MonoBehaviour is createdvoid Start(){mc = FindFirstObjectByType<MainCamera>();//material = new Material(Shader.Find("Unlit/Texture"));// 기본 제공 쉐이더material = new Material(Shader.Find("Custom/std"));// 직접 만든 쉐이더}// Update is called once per framevoid Update(){}void OnGUI(){if (mc != null && mc.rt != null){GL.Clear(true, true, Color.black);#if falseGUI.DrawTexture(new Rect(0, 0, Screen.width, Screen.height),mc.rt, ScaleMode.ScaleToFit);//StretchToFill#elseTexture tex = mc.rt;material.SetTexture("_BaseMap", tex);material.SetColor("_BaseColor", Color.white);float r0 = (float)Screen.width / tex.width;float r1 = (float)Screen.height / tex.height;float r = (r0 < r1 ? r0 : r1);int w = (int)(tex.width * r), h = (int)(tex.height * r);int x = (Screen.width - w) / 2, y = (Screen.height - h) / 2;Graphics.DrawTexture(new Rect(x, y, w, h), tex,new Rect(0, 0, 1, 1),0, 0, 0, 0, material);#endif}}}cs 실행결과는 기본제공 "Unlit/Texture"와 동일하게 어둡게 나옵니다.
URP에서 컬러 처리 방식이 달라져서, 생성된 std.shader파일에서 두군데(21, 55라인)에 코드를 추가하면 정상적으로 출력한다.
#include "Packages/com.unity.render-pipelines.core/ShaderLibrary/Color.hlsl"
#ifndef UNITY_COLORSPACE_GAMMA
c.rgb = LinearToSRGB(c.rgb);
#endif1234567891011121314151617181920212223242526272829303132333435363738394041424344454647484950515253545556575859606162636465Shader "Custom/std"{Properties{[MainColor] _BaseColor("Base Color", Color) = (1, 1, 1, 1)[MainTexture] _BaseMap("Base Map", 2D) = "white" {}}SubShader{Tags { "RenderType" = "Opaque" "RenderPipeline" = "UniversalPipeline" }Pass{HLSLPROGRAM#pragma vertex vert#pragma fragment frag#include "Packages/com.unity.render-pipelines.universal/ShaderLibrary/Core.hlsl"#include "Packages/com.unity.render-pipelines.core/ShaderLibrary/Color.hlsl"struct Attributes{float4 positionOS : POSITION;float2 uv : TEXCOORD0;};struct Varyings{float4 positionHCS : SV_POSITION;float2 uv : TEXCOORD0;};TEXTURE2D(_BaseMap);SAMPLER(sampler_BaseMap);CBUFFER_START(UnityPerMaterial)half4 _BaseColor;float4 _BaseMap_ST;CBUFFER_ENDVaryings vert(Attributes IN){Varyings OUT;OUT.positionHCS = TransformObjectToHClip(IN.positionOS.xyz);OUT.uv = TRANSFORM_TEX(IN.uv, _BaseMap);return OUT;}half4 frag(Varyings IN) : SV_Target{half4 c = SAMPLE_TEXTURE2D(_BaseMap, sampler_BaseMap, IN.uv) * _BaseColor;#ifndef UNITY_COLORSPACE_GAMMAc.rgb = LinearToSRGB(c.rgb);#endifreturn c;}ENDHLSL}}}cs 이번에는 임시로 컬러를 변경해서 실행해보겠습니다.


'[DSU] 게임엔진활용' 카테고리의 다른 글
[게임엔진활용] 2강 게임 개발 해상도(더블버퍼링, 뷰포트) (0) 2026.03.25 [게임엔진활용] 1-5강 쉐이더토이 적용 (0) 2026.03.16 [게임엔진활용] 1-4강 쉐이더로 효과 만들기 (1) 2026.03.12 [게임엔진활용] 1-2강 해상도1 (0) 2026.03.12 [게임엔진활용] 1-1강 프로젝트 생성 및 키보드 (0) 2026.03.12